Scheduling a (Single) Private Lesson
Overview
To schedule a private lesson, click on the time you want to schedule for under the appropriate instructor. A dialog similar to the one below will appear.
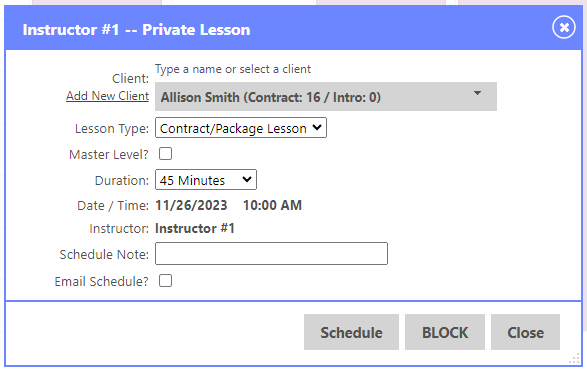
As you can see, when you type or select a client, the number of authorizations they have for their contract/package and introductory packages are shown.
Warning
As a reminder, e-Ballroom decreases contract authorizations upon check in, not scheduling.
Lesson Schedule Notes
e-Ballroom allows you to include a note with each private lesson. This is a free text field that you fill in when booking the private lesson. Enter the note in the “Schedule Note” field as shown in the below graphic highlighted in yellow.
The note can be displayed on the private lesson screen by hovering over the “i” icon with your mouse. When checking in the client, you can also see the note on the check in screen.

Scheduling the Lesson
To finish scheduling the lesson, select the lesson type and the lesson duration. The system defaults the duration to what you have configured in Options, as shown in the initial setup. If the instructor teaches at the master level (e.g. master level pricing), you can select this by checking the “master level?” checkbox.
Important Considerations for Private Lessons
- The selected lesson type does NOT restrict the payment types you can use
- For example, a lesson booked as “Pay As You Go” can use a payment method of “On Contract/Package”, and authorizations will be deducted properly
- You can apply mater level pricing at check out
- The schedule note is viewable from the appointment screen (hover over the “info” icon on the lesson), and at check in
- You can book multiple lessons at the same time and with the same instructor
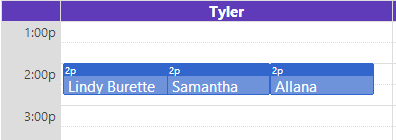
Double/Triple/Multiple Booking
e-Ballroom does allow instructors to be booked multiple clients at a time. To do this, simply click on the whitespace to the right of the existing client(s) and schedule them. They will appear as follows: