Managing Existing Clients
Searching for Clients
To open a client for management, go to Clients > “View /Edit Existing Client(s)”. In this grid, you can search for or locate a client by their name. Search allows you to match on their first or last name, their full name, or their phone number.
For a phone number search, it is best to leave out any punctuation as if you enter some numbers with dashes (-) or periods (.), a search with the punctuation may not produce a match.

In the example above, we searched for “Allison” and received one match. You can use the icons on the right to take action or view additional information as described below:

View/Edit Client Information
When you first open a client, the default tab is “Client Profile”. Here you can revise things such as their birthday, contact information, their barcode, and client notes. You can also archive or delete the client. When you have made your changes, simply press “Update”.
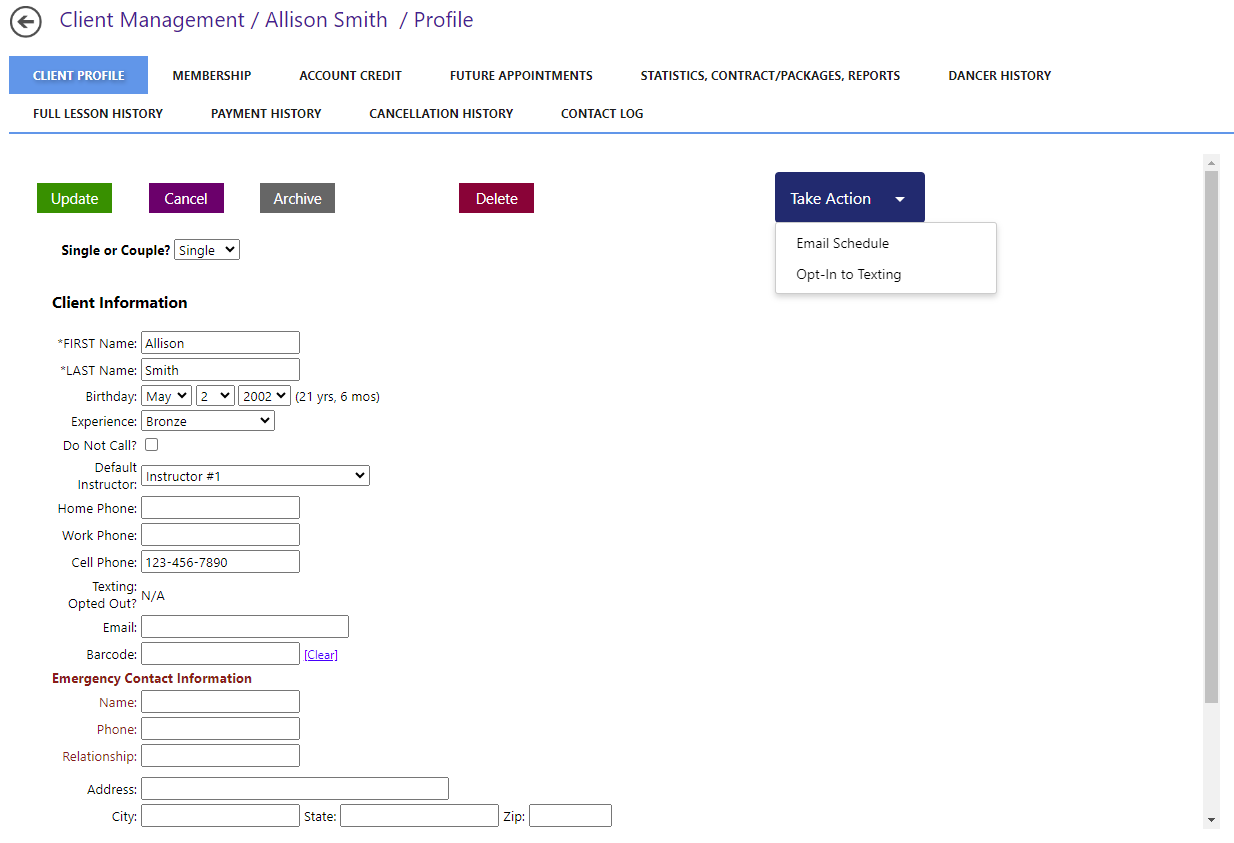
The “Take Action” button also allows you to quickly perform two actions for a client: opt-in to text messaging or email their private lesson schedule to them.
Updating Account (Dollar) Credit from the Client’s Profile
Although you can modify a client’s account credit by going to “Clients” > “Manage Account Credit”, you can also modify the credit for a client from the “Account Credit” tab of their profile.
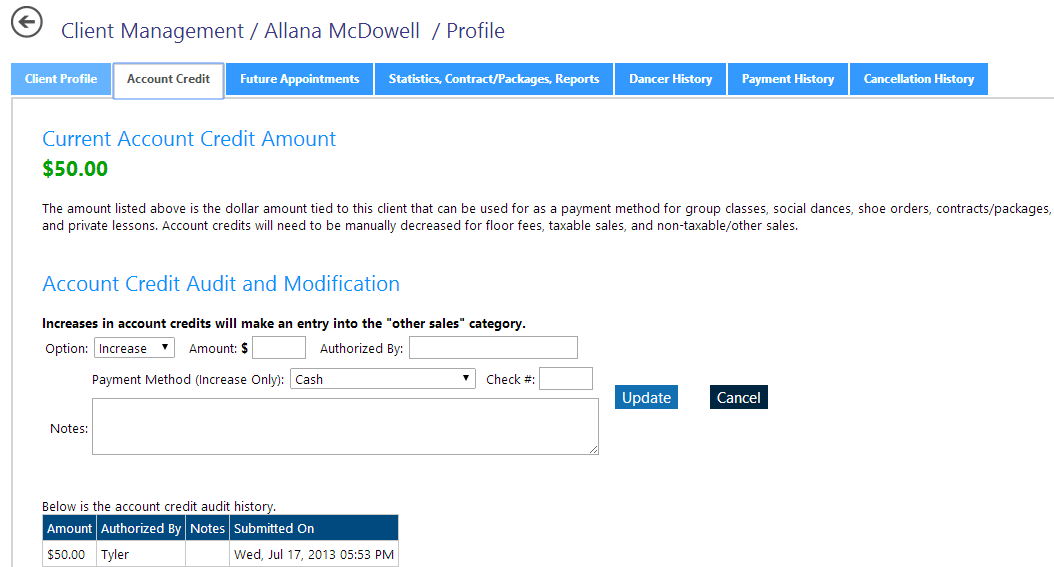
Note, to utilize the account credit, you should select “Account Credit” as the payment option when checking in a client to a private lesson (pay as you go), group class or social dance. This will be explained later in the guide.
To increase or decrease the account credit, select the option and then enter the amount. Provide the additional information, such as the name of the individual authorizing the credit, and the method of payment. Notes are highly encouraged. Press “Update” when complete.
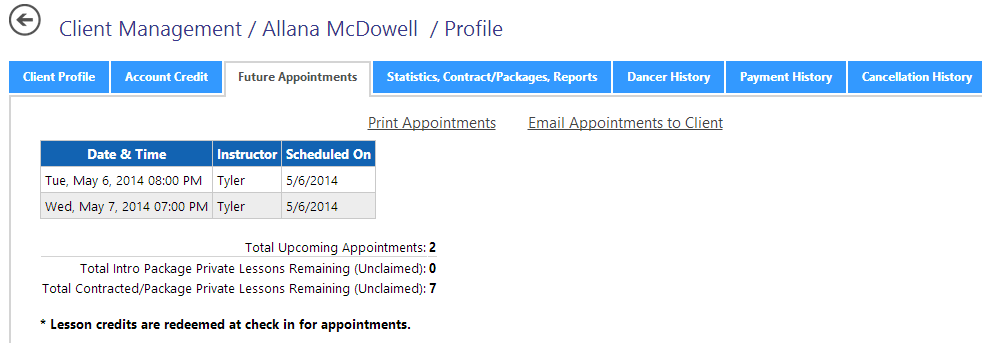
View Future Appointments (from client profile)
Click the “Future Appointments” tab to view the client’s future private lessons. You can also email this to the client or print the report from your browser.
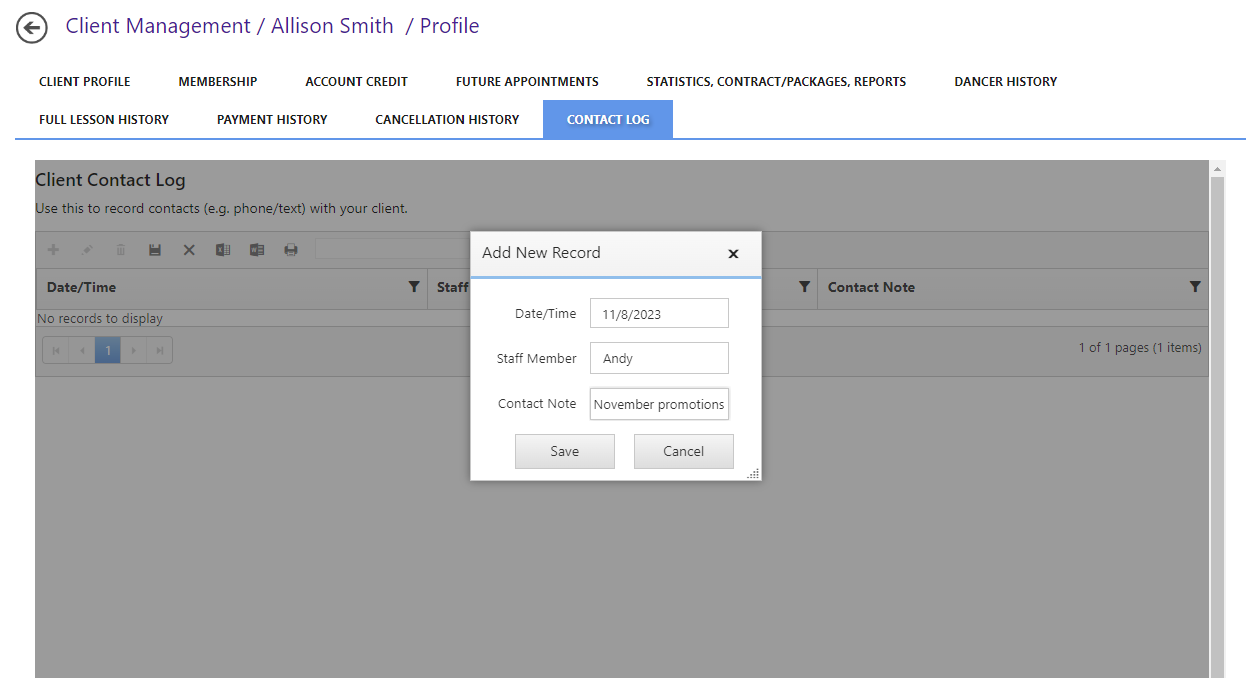
Contact Log
You can record contact attempts by using the “Contact Log” feature. Click on the “Contact Log” tab. Use the “+” icon to create a new record.
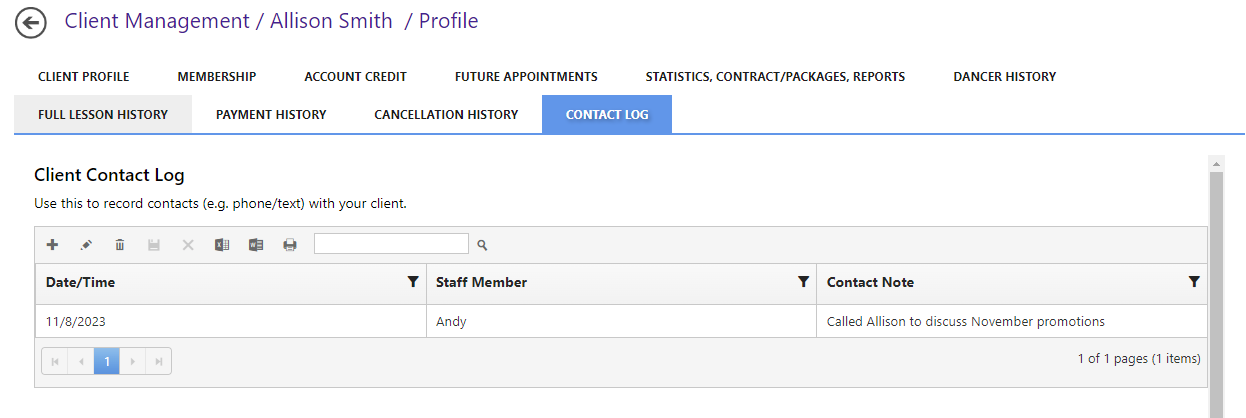
Press “+” to add a record.
Select a record, and press the “pencil” icon to edit it. Selecting a record and pressing the “trash can” icon will delete it.
You can optionally search, export to excel, export to word, or print the contact log.