Other Features
!!! warning "Under Construction - Warning: Dated Material" This section of the help guide is under revision. Please pardon our dust as we work to complete these updates!
Membership
Initial Setup
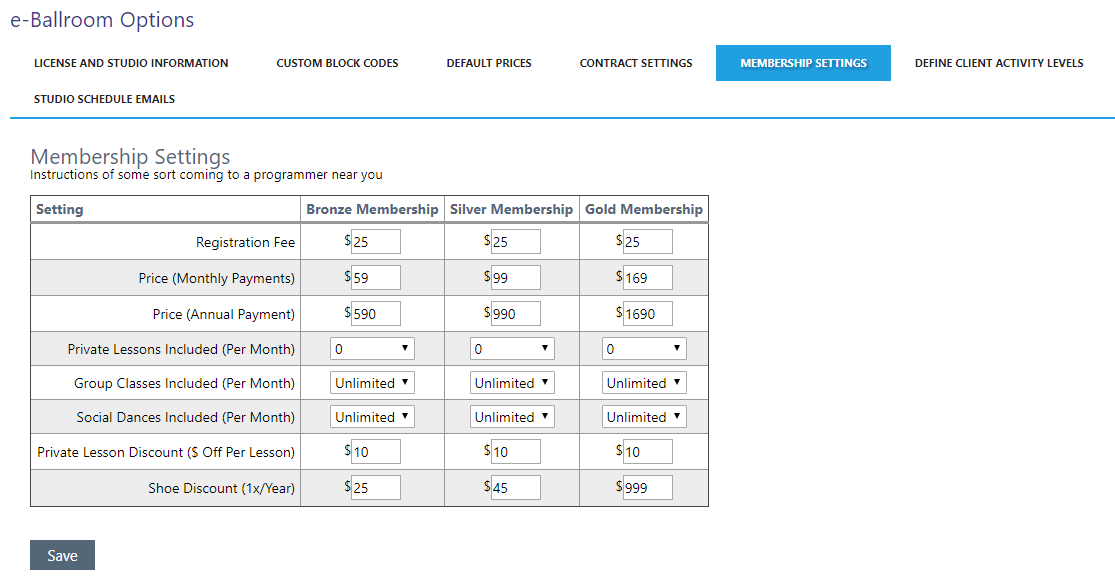
Before creating memberships, be sure you configure your membership settings. To do this, click “Settings” > “Program Options and Settings”. Click the “Membership Settings” tab. Be sure you configure your default membership settings as desired; note, you will be able to customize the information when creating a membership.
The very last option in the drop-down menus for Private / Group / Social lessons are for “Unlimited”. When ready, press “Save”.
Adding Membership
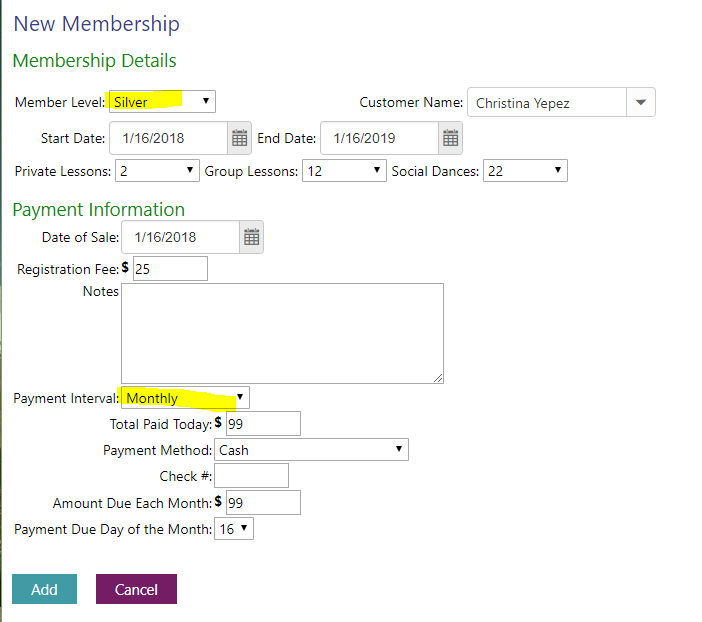
To add a membership for a client, click “Membership” > “Add Membership”. First select the membership level for the client. Defaults will then be filled in for authorizations and cost, however you can modify the values as desired.
The graphic below depicts a monthly payment interval. The total paid today will appear on the daily sales sheet for the date provided in the “Date of Sale” field. Alternatively, you can select an “Annual” payment interval. When complete, press “Add”.
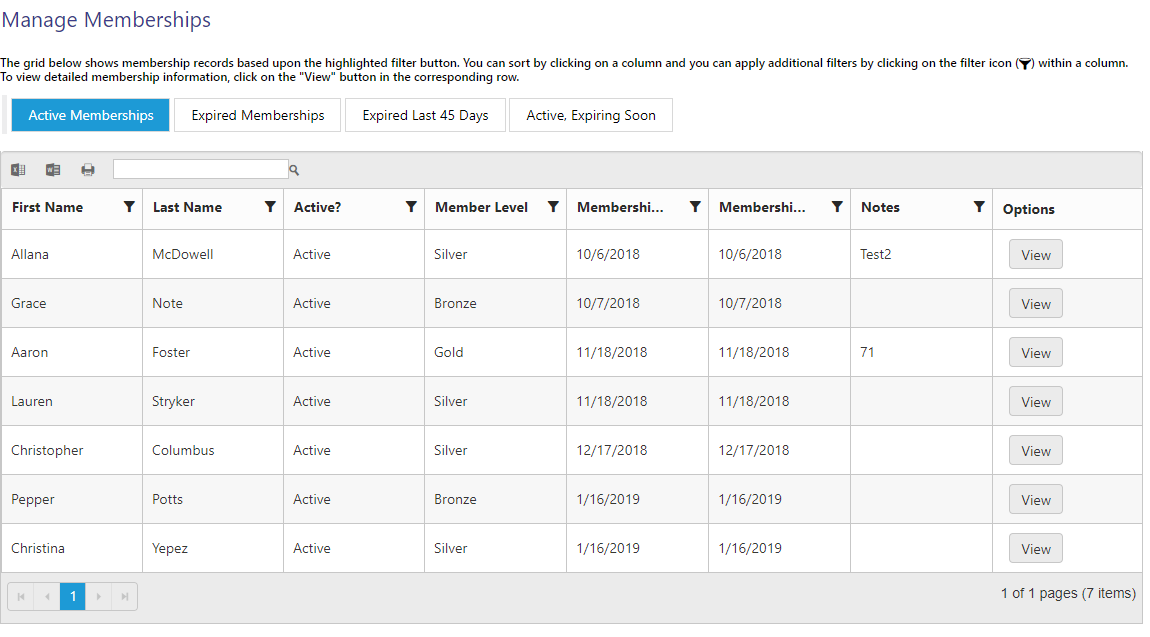
Managing Membership
To manage memberships, click “Membership” > “Manage Membership”. The following screen will appear.
The buttons at the top allow you to filter between various states, such as active or expired memberships. Within the grid, you can filter based upon name. Simply click on the filter (  ) icon.
To view completed and future payments and other information regarding a customer’s membership, click “View” for the customer.
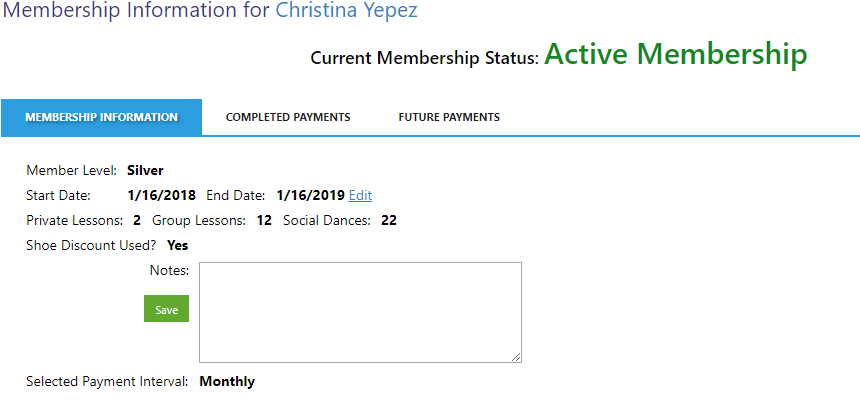
Viewing / Editing a Membership
When you click “View” in the “Manage Membership” screen, you will be shown the screen below.
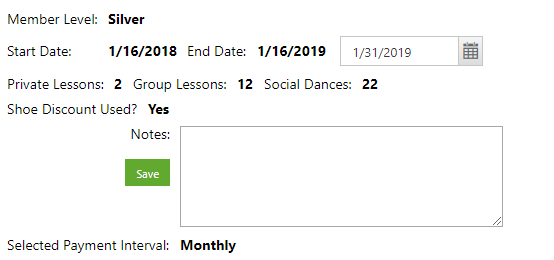
To edit the expiration date, press “Edit” by the End Date. A date picker will appear as shown below; select the new date and press “Save”.
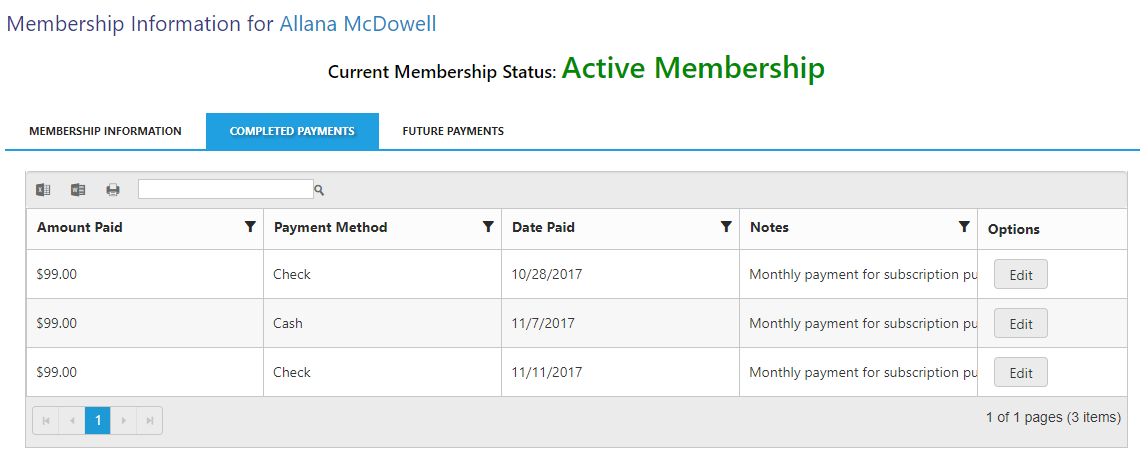
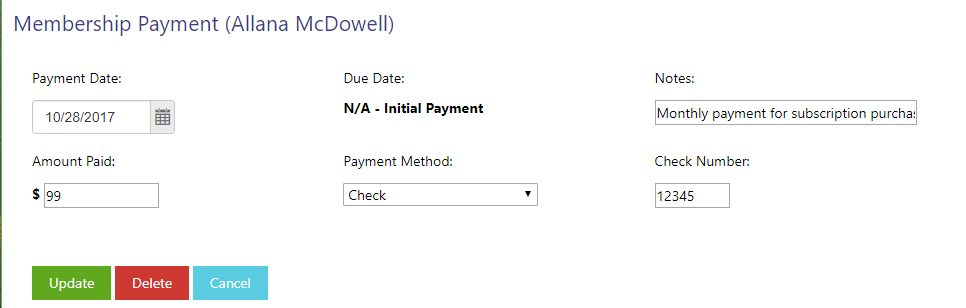
Editing a Completed Membership Payment
Select the “Completed Payments” tab. You can edit information regarding a membership payment by clicking the “Edit” button for the corresponding payment.
A screen similar to the one below will appear. When ready, press “Update”.
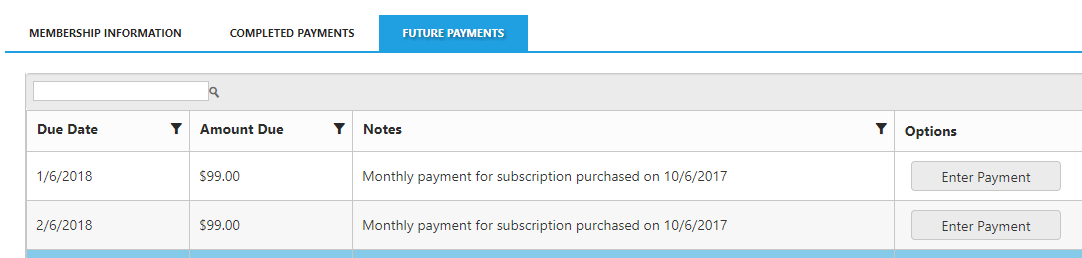
Add Future Membership Payments
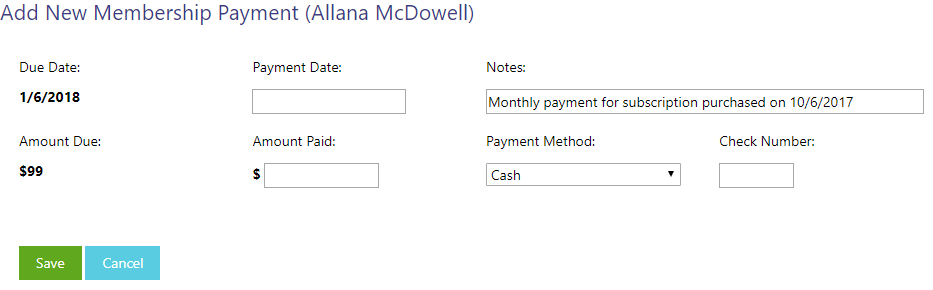
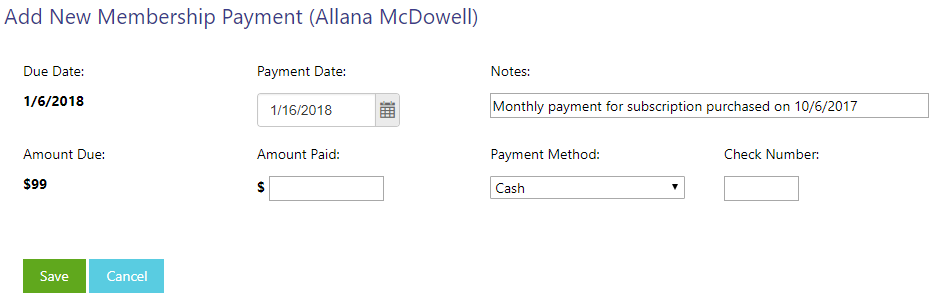
To add a payment for a payment in the future (e.g. if a customer is paying early), click the “Future Payments” tab on the Membership Information page. Locate the payment in question, then press “Enter Payment”.
Enter the payment information and press “Save” when ready.
Adding Membership Payments
To add a membership payment, click “Membership” > “Add Membership Payment”. The following screen will appear.
Press “Enter Payment” for the payment you want to annotate, then complete the form that appears. Press “Save” when ready”.
Membership Rosters
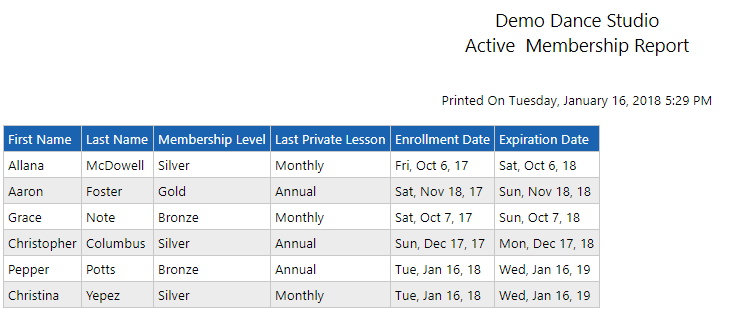
To view active or inactive members, select the desired roster by clicking “Membership” > “Membership Rosters”, and then the desired roster.
A new window will appear with the roster, similar to the one below.
Client Debt (Owed to Studio) Management
To manage debts (e.g. when a customer forgot to pay or an instructor forgot to collect payment), which require selection of the “Outstanding Balance (Debt)” payment method, go to “Clients” > “Client Debt (Owed) Management”. The total amount owed and by whom is shown as the example below depicts.
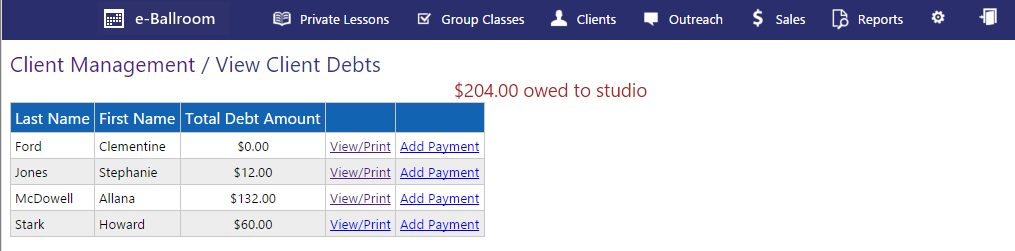
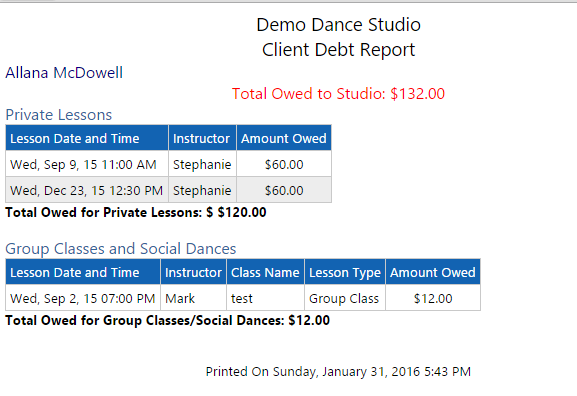
From here, you can view/print the debts as shown below.
Or, you can record a payment via “Add Payment”.
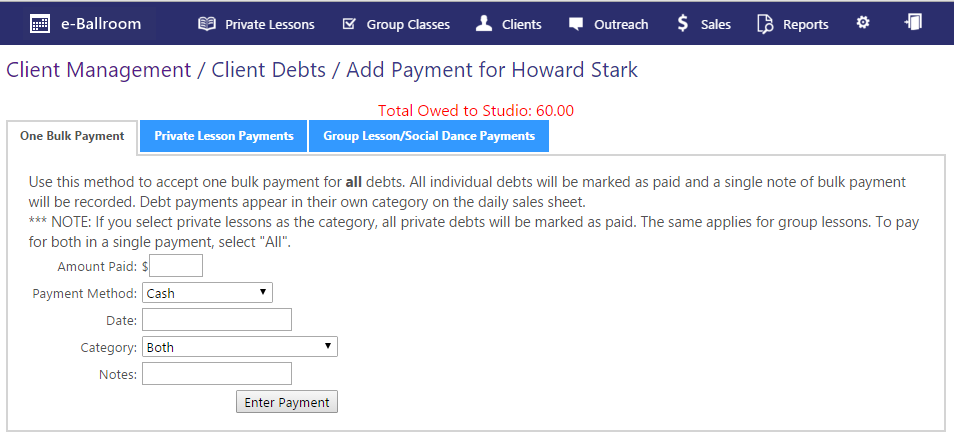
Bulk Debt Payment
If a client makes a large payment that is not tied to a specific lesson, or pays off all debts at once, the bulk payment option is best. Simply fill out the form, selecting the proper category (e.g. Private vs Group/Socials or both) When ready, press “Enter Payment”.
Private Lesson Debt Payment
To pay for specific private lessons, click the “Private Lesson Payments” tab. A screen similar to the one below will appear.

When ready, press “Update”. Note that for a payment to be removed, the “Mark Paid” column must be checked!
Group Class/Social Dance Debt Payment
To pay for specific private lessons, click the “Group Lesson/Social Dance Payments” tab. A screen similar to the one below will appear.

When ready, press “Update”. Note that for a payment to be removed, the “Mark Paid” column must be checked!
Reports
NOTE: Some reports open in a new window when displaying or printing. You will want to disable your pop-up blocker for www.e-ballroom.com!
 |
 |
|---|---|
A select few of the reports are explained within this help guide. To view and print the reports not showcased within this guide, go to “Reports” and then click on the desired report.
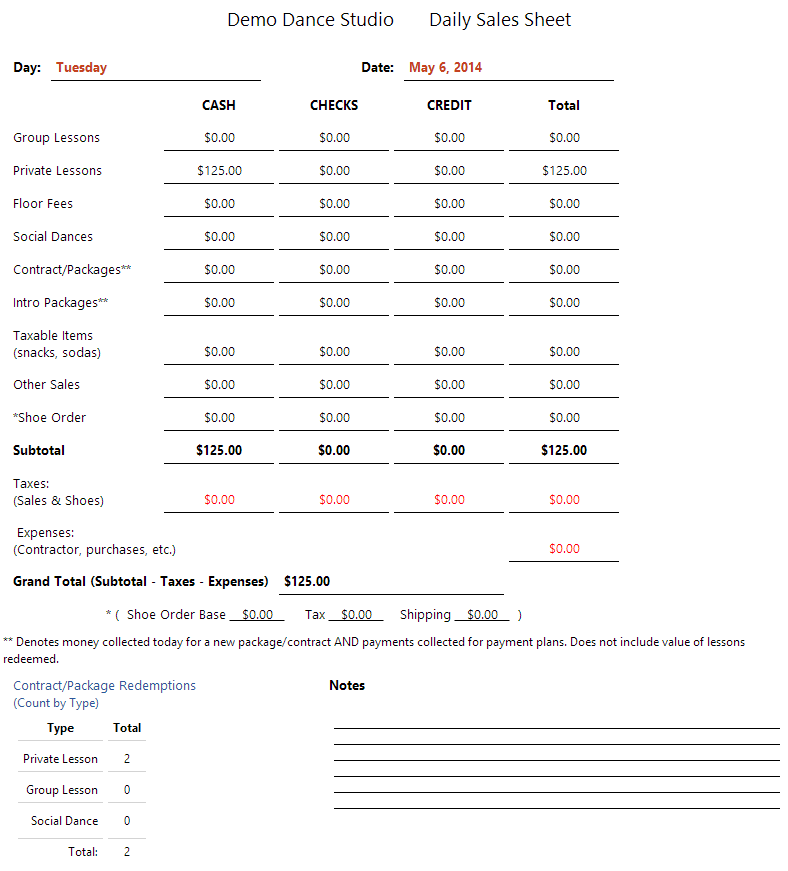
Daily Sales Sheet (Non-Itemized)
To view a daily sales sheet (Summary View), go to “Sales” > “Daily Sales Sheet”. By default, today’s sheet is displayed. A sample report is shown below.
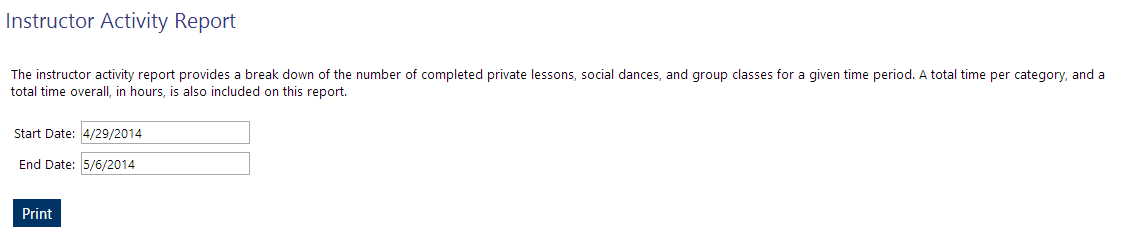
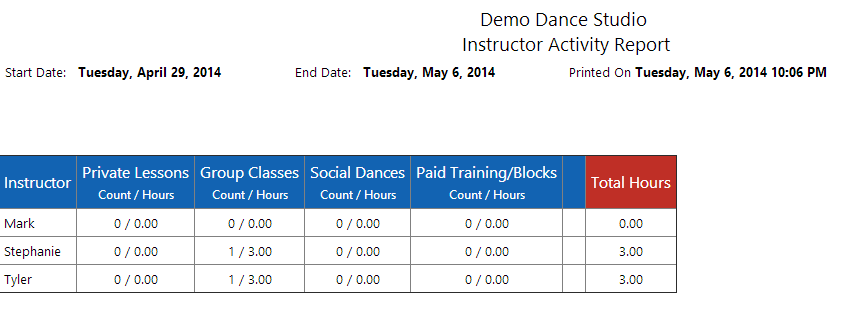
Instructor Activity Report
The instructor activity report shows the number of completed private lessons, social dances, group classes, and paid trainings accomplished by each instructor in a given time period. You can set the time period when prompted as shown below.
Outreach: Text Messaging Setup
Initial Setup
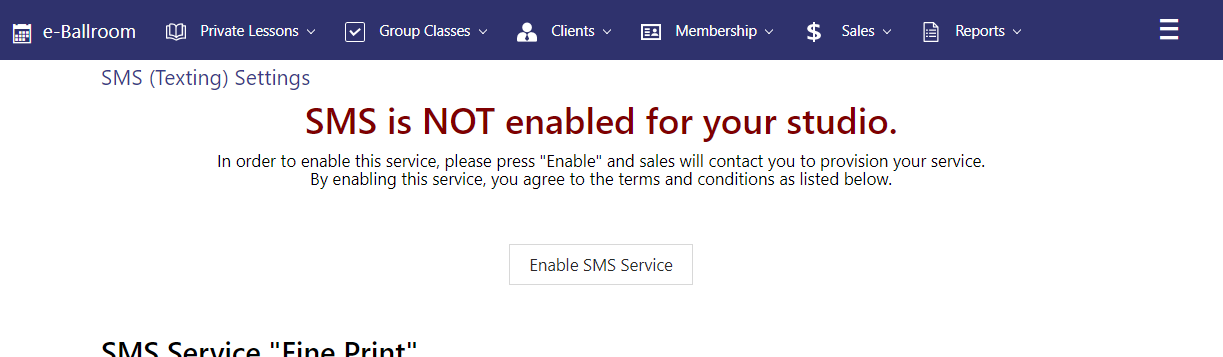
e-Ballroom’s text messaging feature is not enabled by default. The current billing and terms and conditions can be read at any time at “Outreach” > “Text Message Settings/Billing”. Visit this page, as shown below, and press “Enable SMS Service”. An e-Ballroom.com Support Representative will enable SMS for your studio within 24 hours of payment.
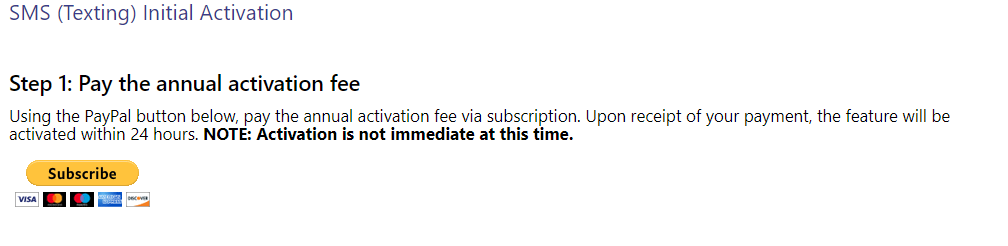
Activation Step 1: Pay Annual Fee
To pay for the annual activation fee after pressing “Enable SMS Service”, you will see the following screen. Press “Subscribe” and you will be redirected to PayPal for payment processing.
Activation Step 2: Purchase Initial Text Message Load
To pay for your initial load of text messages, select the number of messages you wish to purchase. Press “Buy Now” to complete the purchase with PayPal. Your activation and text message load will be activated within 24 hours.

SMS Remaining Counts, Purchase More Texts, and Cancel SMS Features
Once you’ve activated your SMS feature, you can view the number of text messages remaining at any time by going to “Outreach” > “Text Message Settings/Billing” as shown below.
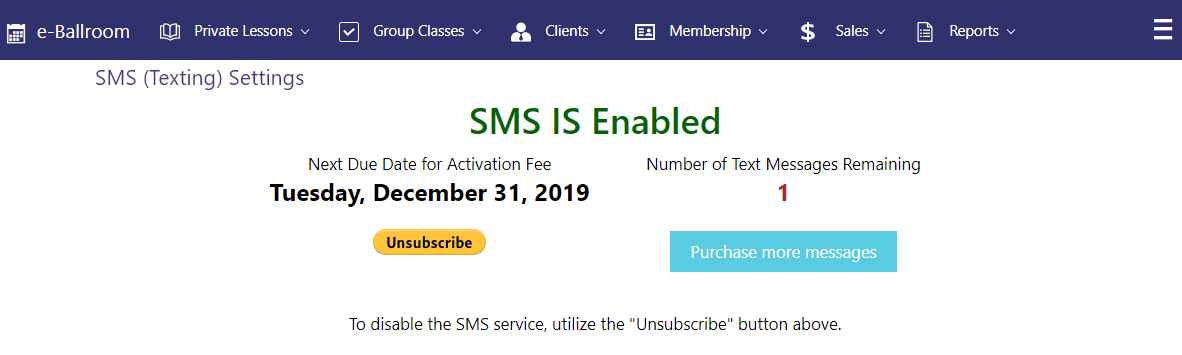
To purchase more messages, press the blue button. You will then be redirected to a form where you can select the number of messages you wish to purchase and complete payment with PayPal. Your new text message load will be added within 24 hours.
To cancel the SMS feature, hit “Unsubscribe”.
Note: Some customers may not have setup a PayPal SMS subscription. Only click this if you activated or renewed the SMS feature after 15 January 2018. Contact support if you have any questions or encounter any issues.
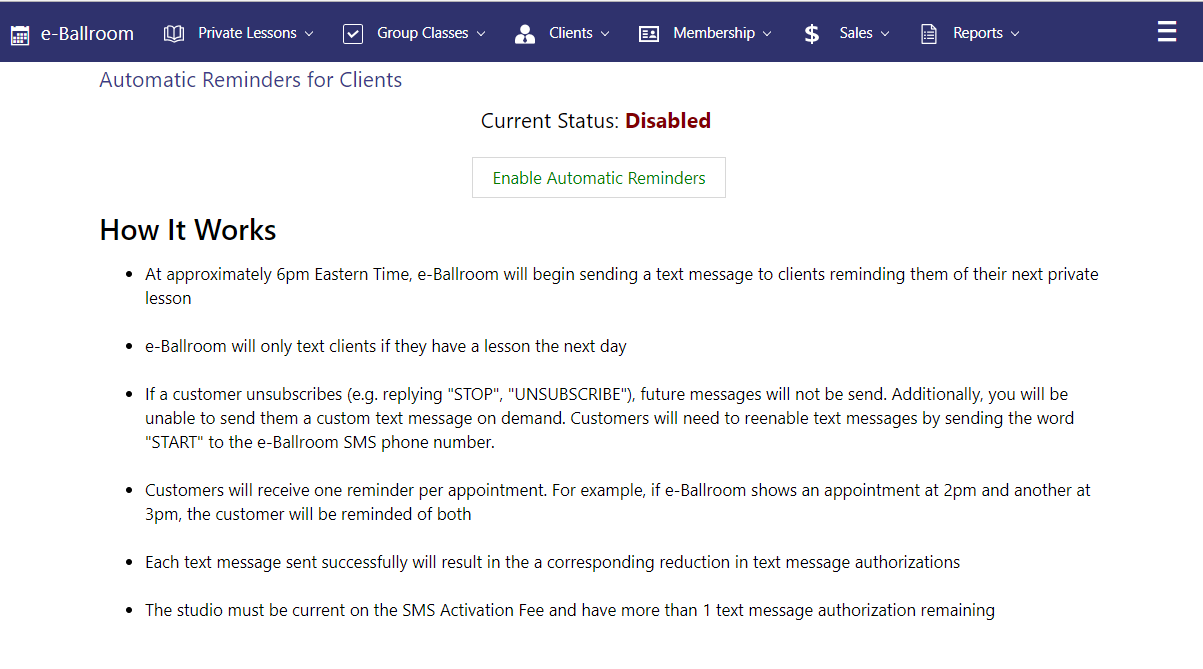
Texting Private Lesson Reminders (Automatic)
To enable automatic private lesson reminders for clients, go to “Outreach” > “Automatic Private Lesson Reminders”. Press “Enable Automatic Reminders” to turn the feature on.
Texting Private Lesson Reminders (Manual)
To send private lesson reminders manually, you can selectively remind clients or you can remind all clients of their upcoming lesson. To perform this function, go to “Outreach” > “Send via Text: Private Lesson Reminders”. A screen similar to the following will appear.
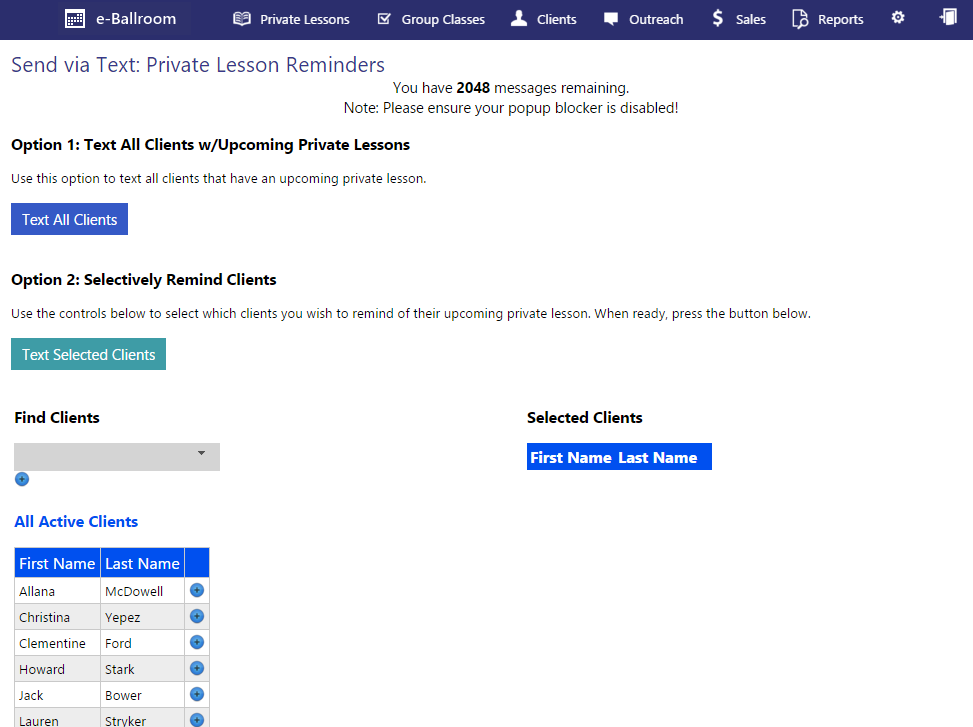
To text all clients with upcoming lessons, simply press “Text All Clients”.
To text specific clients, find them in the grid and press the blue “+” button. Alternatively, you can us the drop down/text box and press the blue “+” button. The clients will appear on the right hand side of the screen. When ready, press the “Text Selected Clients” button.
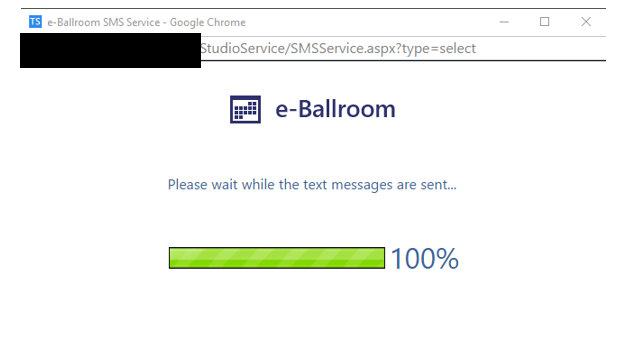
A new window will appear similar to the one below which will allow you to monitor the progress and close when at 100%.